Back to Asset Essentials Main Menu
WO statuses
Work orders can have several statuses from their creation to their archival. By default, your Asset Essentials account will be populated with default statuses, but you can configure this list to include the statuses that are best for your work flow. *Note: The feature below is only available to clients who have purchased Asset Essentials Enterprise. Please contact your Sales Representative or Client Services if you are interested in purchasing Asset Essentials Enterprise.
How to add a work order status
- Click on the Admin menu icon, then click on Configurations.
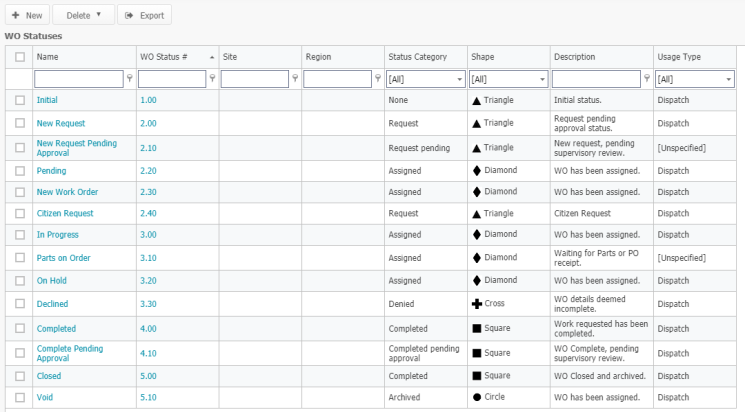
- Select WO Statuses from the Work Order section.
- To create a new work order status, click the New button.
- Fill in the appropriate information in the following sections.
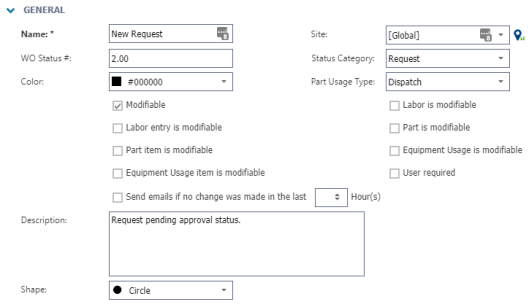
General
- Enter a Name for the status. This is the only required field.
- Choose whether the status will be available to only a particular Site, or across all sites.
- Choose a Status Category from the drop down menu.
- You can check the box next to Modifiable to allow the work order to be edited when in this status.
- Enter any other applicable information, such as Description.
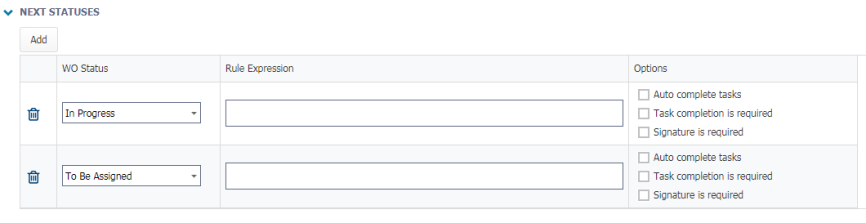
Next Statuses
The Next Statuses section allows you to decide which existing WO Statuses can follow the new one being created.
- Click on the Add button to add an existing status. *Note: Existing WO Statuses can also be modified to limit or expand the list of Next Statuses.
- If applicable, enter a Rule Expression. A rule is a Boolean expression that will return true or false. An expression is made up one or more conditions with “AND” or “OR” relationship. *Note: For more information on rule expressions, please contact your Consultant or your Implementation Specialist.
- Repeat this process for as many statuses as needed.
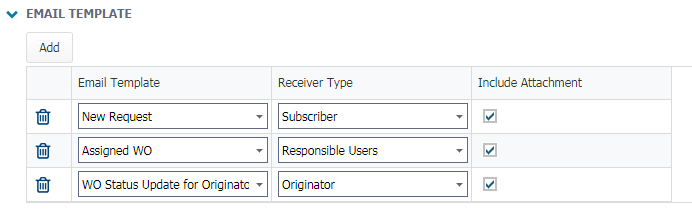
Email Template
When you create a new work order status, you can also choose to use a particular Email Template to notify one or more users.
- Click on the Add button and select an Email Template from the drop down menu.
- Select a Receiver Type for the selected Email Template:
- Originator - The user who submitted the work order.
- Responsible Users - The user(s) assigned to the work order.
- Subscriber - The user(s) listed in the Subscriber section below for this particular work order status.
- Repeat this process for as many Email Templates as needed.
Subscriber
If you added an Email Template to this WO status with the Receiver Type of Subscriber, the user(s) listed in this section will be recipients of that particular email.
- Use the Select User (
) or Select Me (
) icons to add users to the Subscriber section.
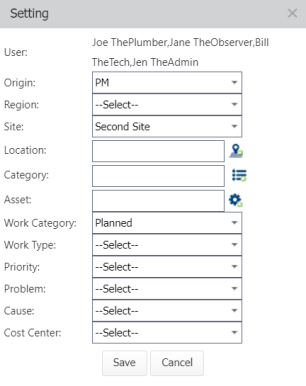
- In the Setting pop-up window, select the appropriate value for the fields you would like the Subscriber to receive work order emails for. *Note: This will apply to every user that was selected as a Subscriber. If you would like to select different values for the fields for each individual user, click Save on this pop-up window, then click the gear icon next to each individual user in the Subscriber section to select their own settings.
- Click the Save button at the bottom of the pop-up window.
- Click the Save button at the top of your screen to add this status to Asset Essentials.
